These little snowmen are so easy to make! The supplies are really inexpensive and they don't take a lot of time! Here are the step by step instructions to build your own set of snowmen!
What you'll need:
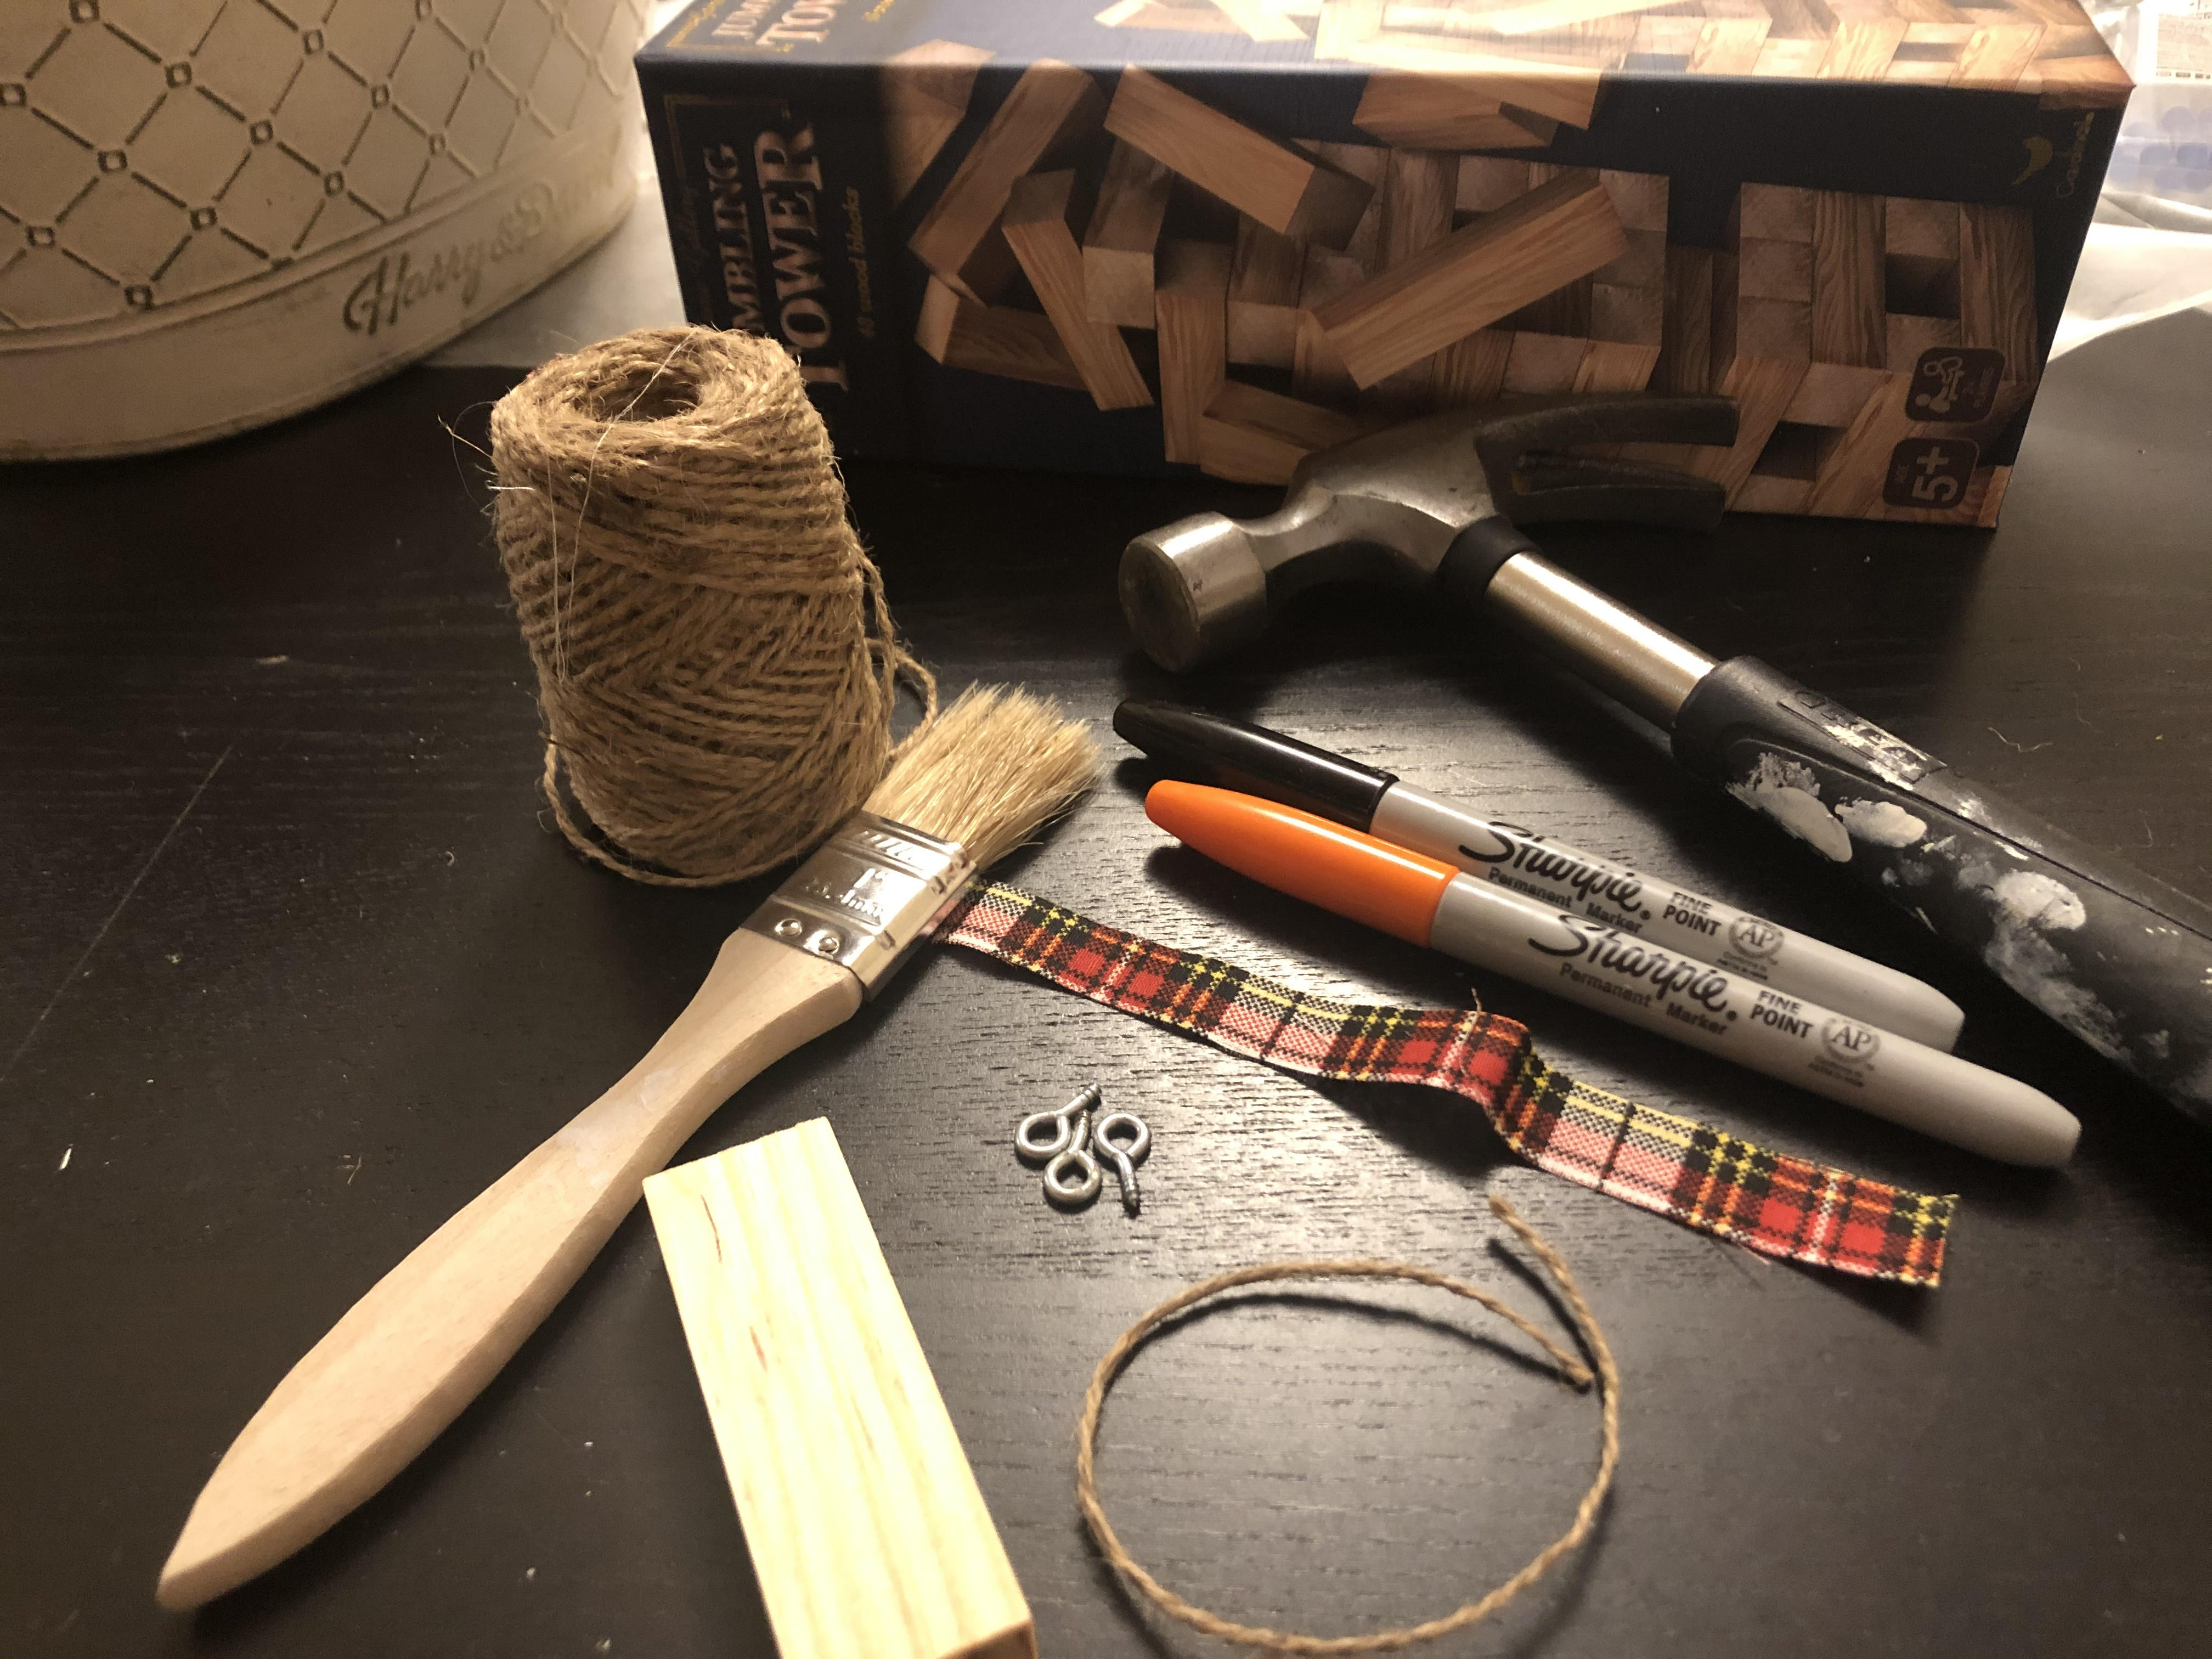
- Wooden blocks - we used generic tumbling tower/jumbling tower blocks from the local big box store since they don't have any logos on them. These come 48 to a box for $5-$6 per box.
- White acrylic paint
- Paint brush
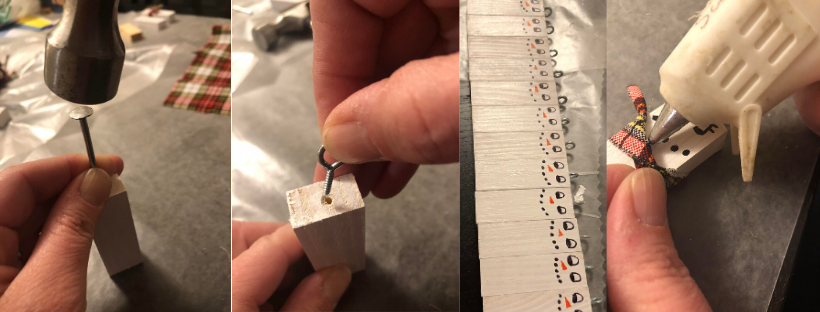
- 1 large nail and a hammer
- 3/4" screw eyes - one per snowman
- Permanent markers - black and orange
- Scrap fabric or ribbon - one 6" X 1/2" piece for each snowman's scarf
- Twine or sisal string - one 6" piece per snowman
- Glue gun, glue dots or tacky glue to secure scarf
- Wax paper to cover your work surface (wet blocks will stick to newspaper)
- Small piece of sandpaper to finish edges
Instructions:
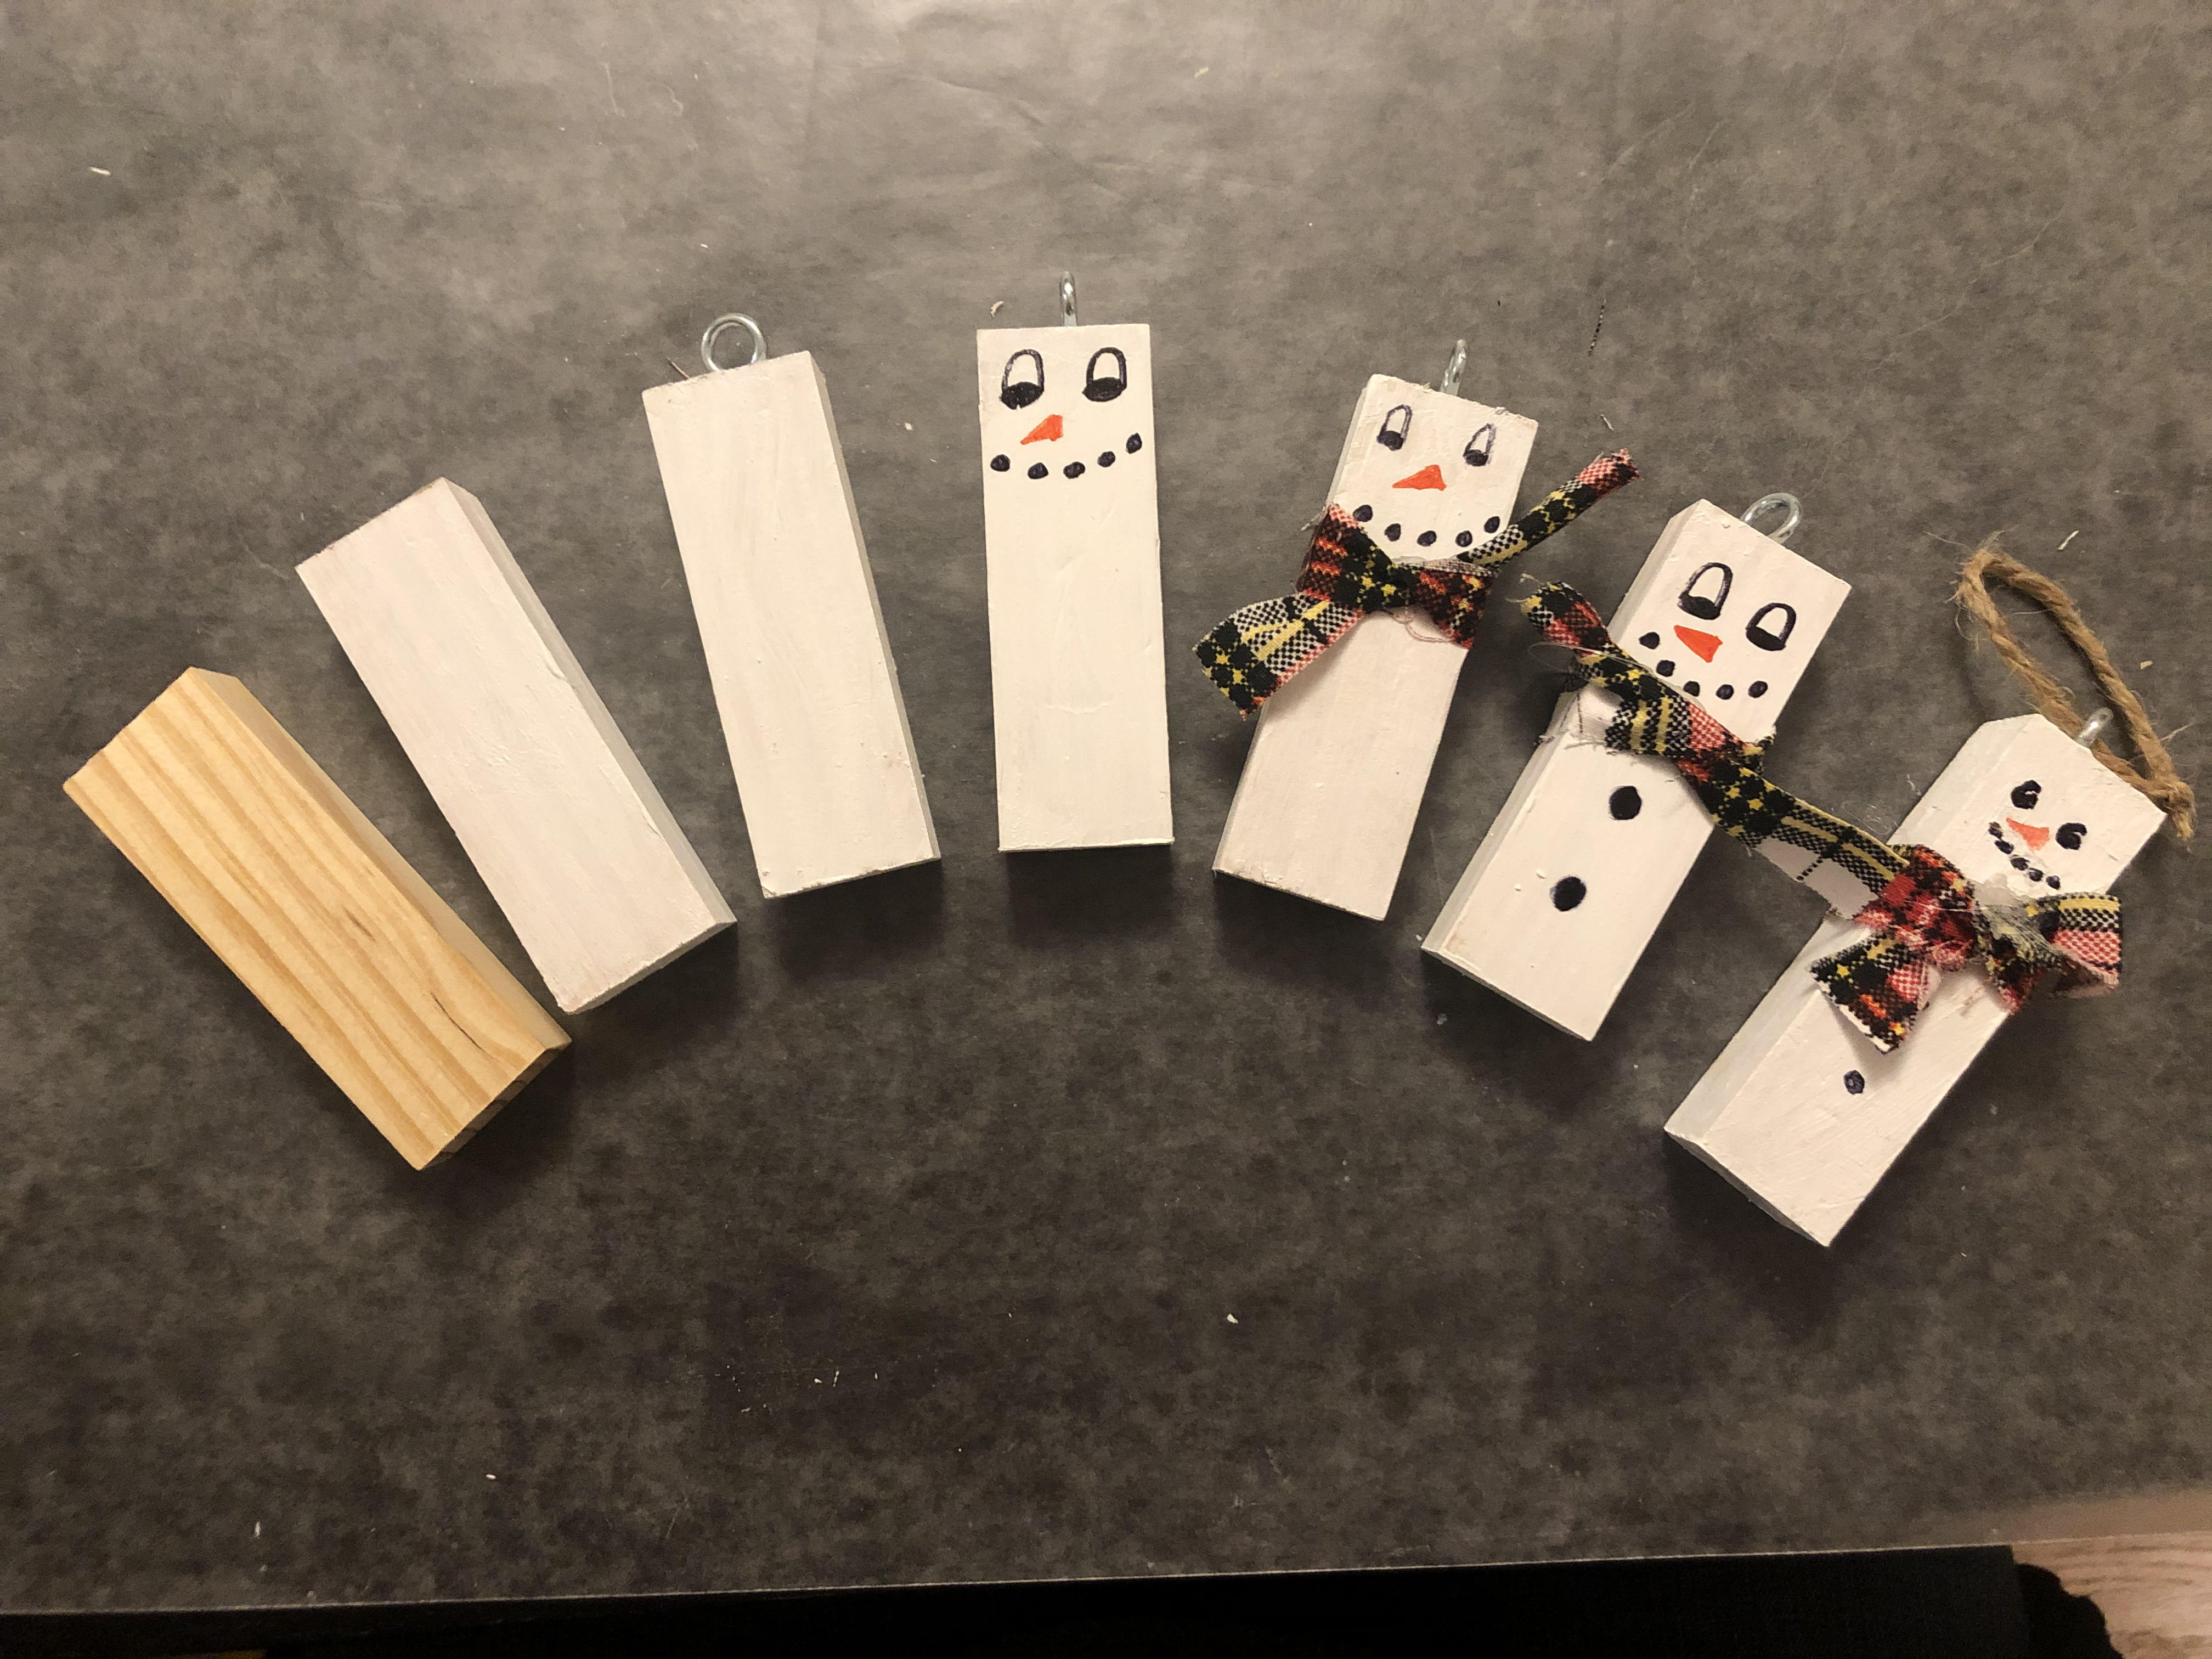
- Start with a plain wooden block.
- Paint the block on all sides with white acrylic paint. This is a two step process so you can get all sides - we did all but the bottom, let them dry, and then painted the bottoms and let them dry again.
- If there are any messy edges, use a small piece of fine sandpaper to fix the edges. You can also use the sandpaper to make the snowmen look a bit distressed if you like!
- Insert a screw into the top of each block. We first made a starter hole with a hammer and large nail, and then screwed in the screw eye.
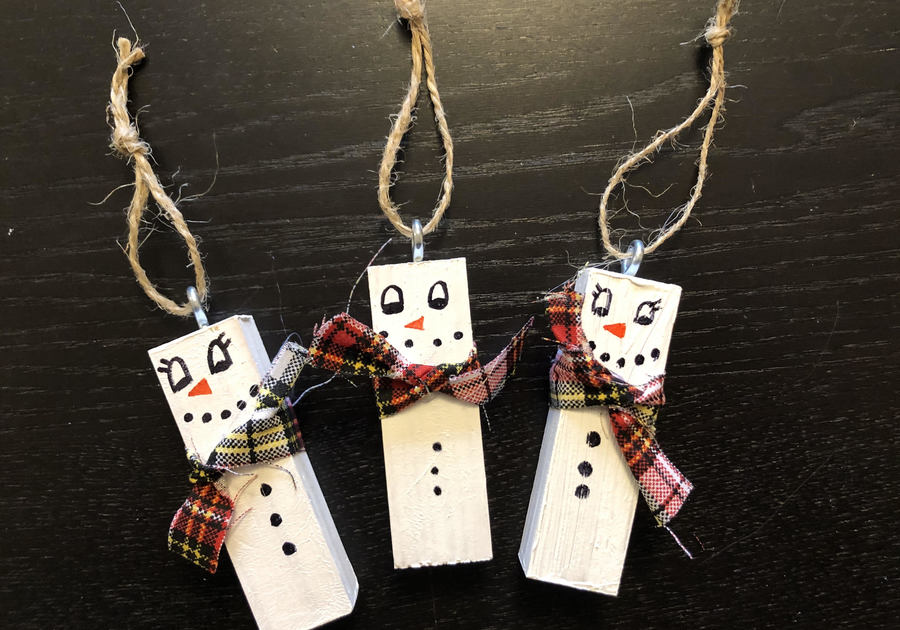
- Using the permanent markers, draw on your snowman's face.
- Tie a scarf around the block just below the face. We used thin strips of fabric which were easier to work with than stiff ribbon. It's a great way to use up extra crafting supplies if you have leftovers lying around.
- We then added a dot of hot glue under the fabric so the scarf would stay in place. A glue dot or tacky glue would work as well - just use what you have at home!
- Using a permanent marker, add dots for buttons below the scarf to complete the snowman.
- Tie a piece of string through the screw eye on top, and your snowman is ready for display!
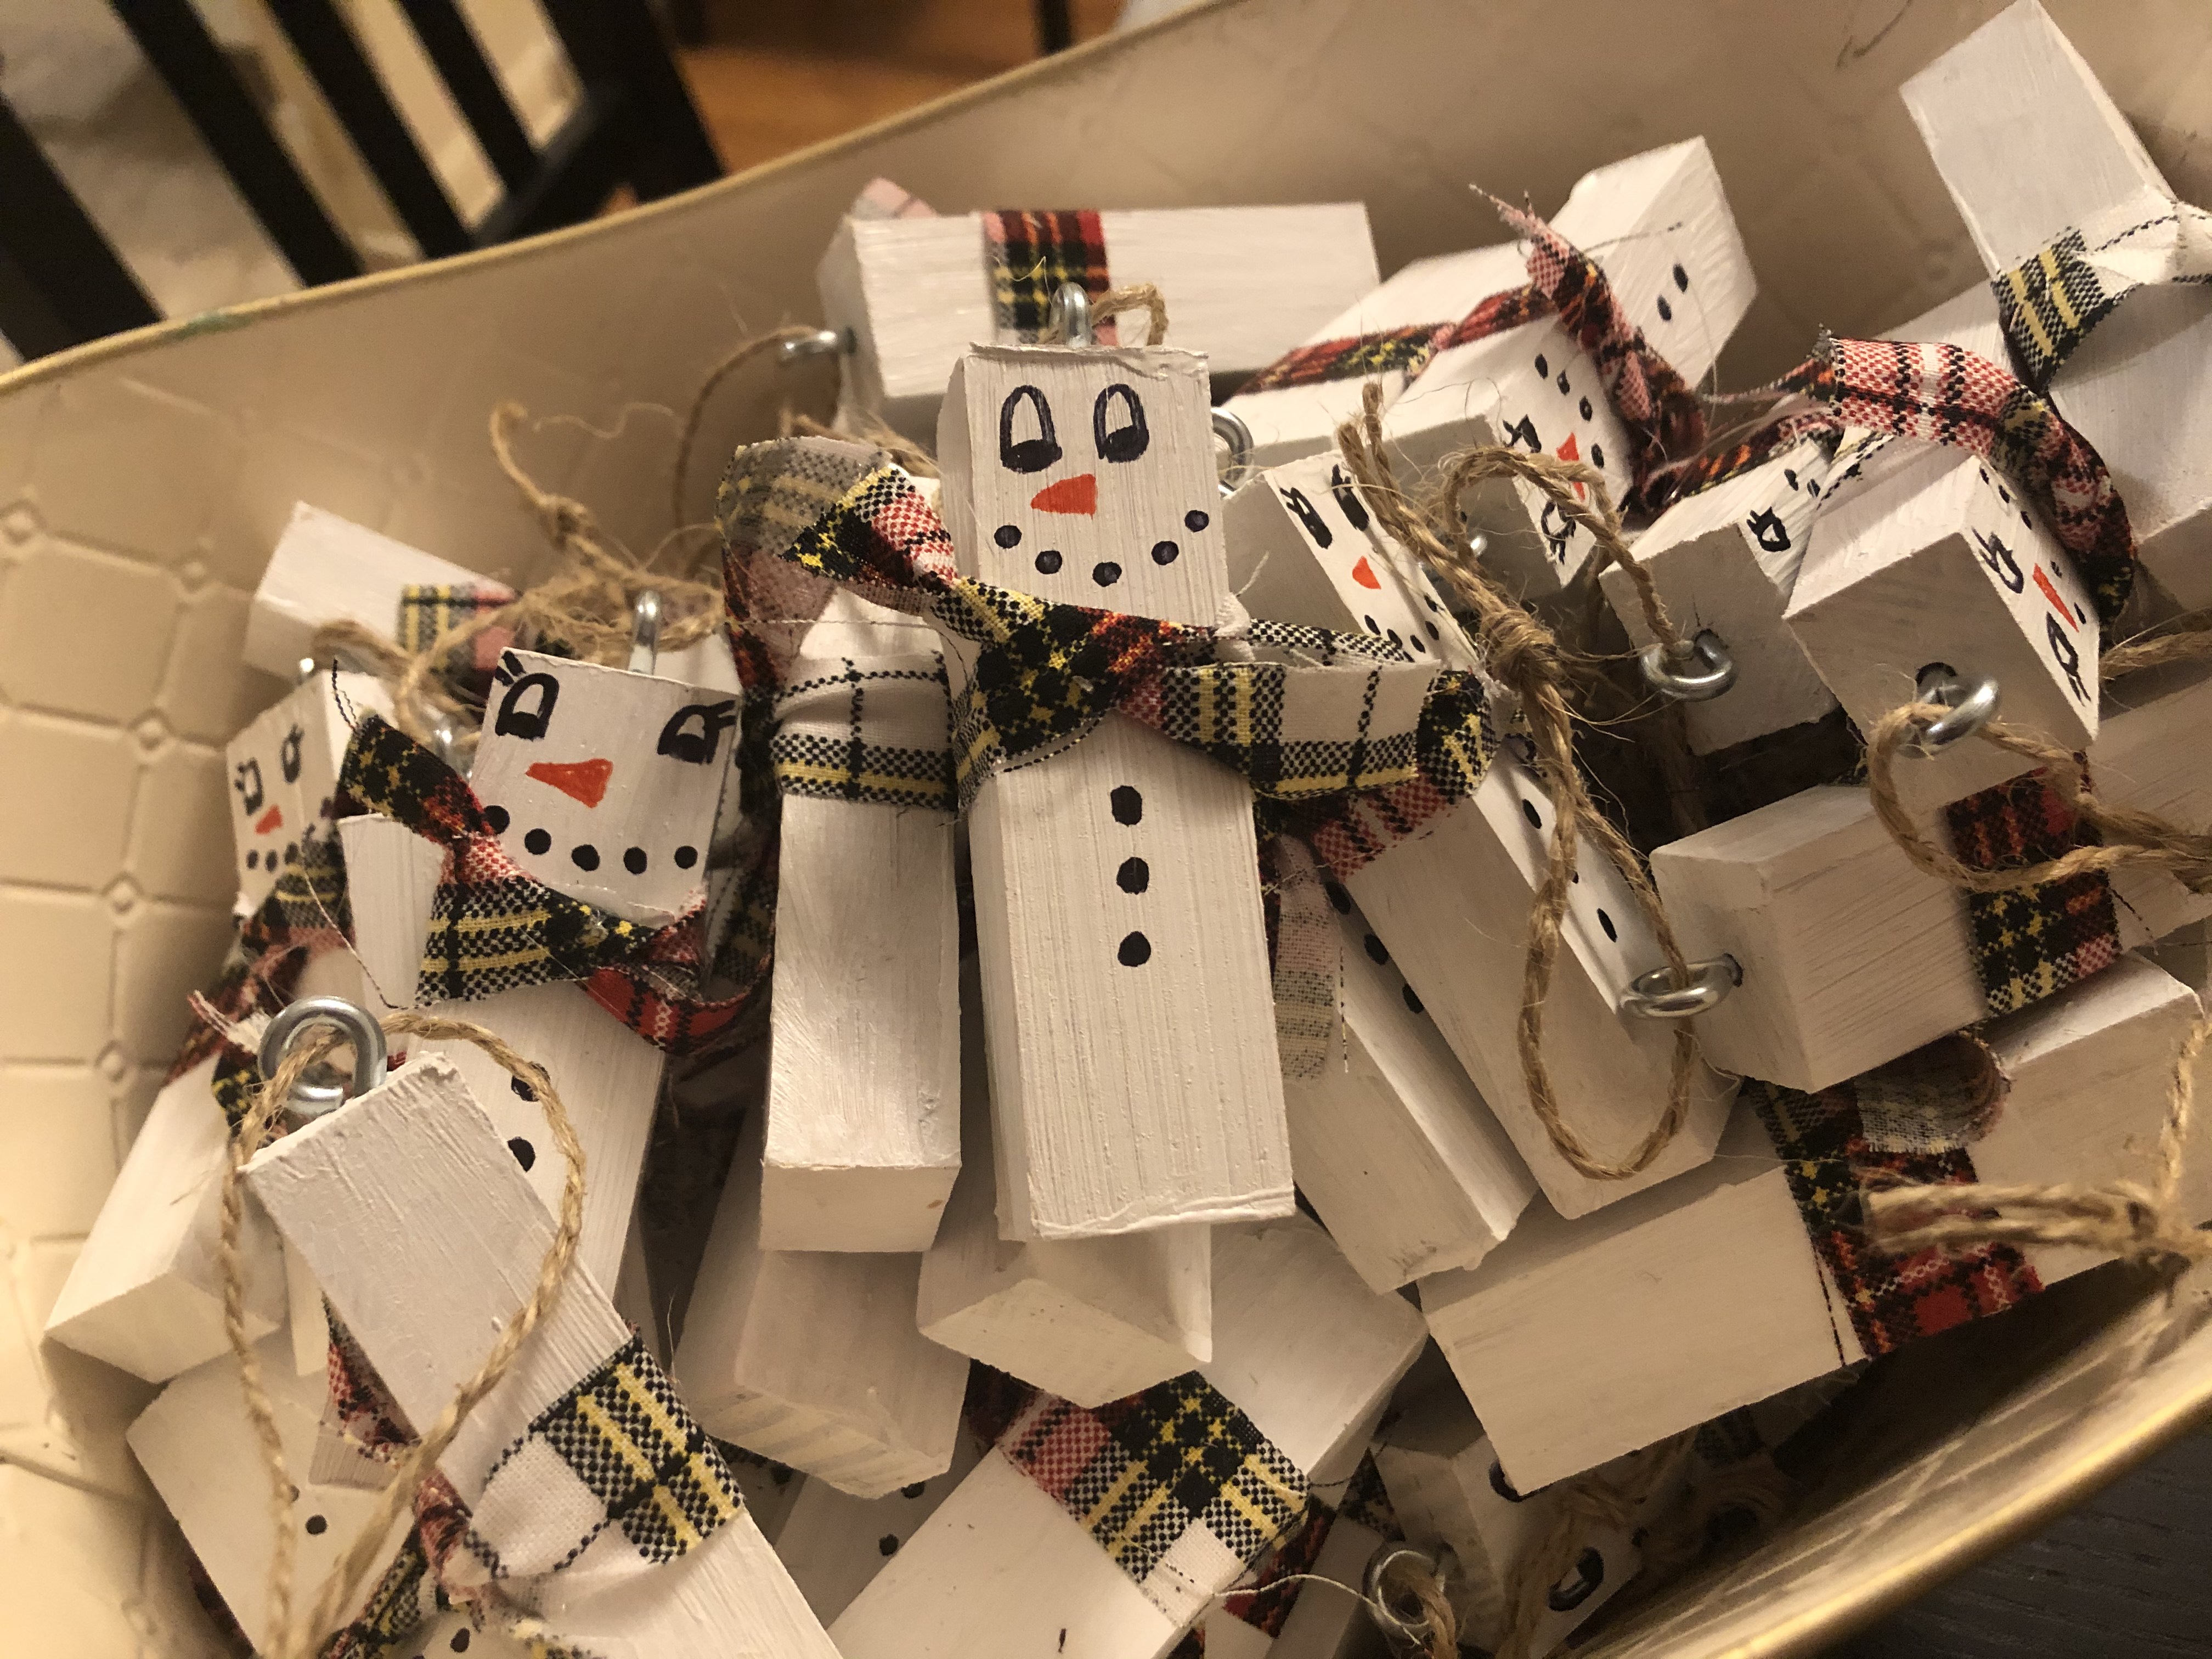
And just like that, you have worked as a family to make a wonderful winter craft! They make great present toppers or ornaments. You could personalize them and use them as place cards for holiday meals. Add them to a gift card for your child's teacher for a personal touch. My daughter's girl scout troop just had a table at a craft fair to raise money for their bronze award - her snowmen were a popular item at the fair!
The possibilities are endless for these little guys and I hope you have as much fun making them as we did. Happy winter!